DIY Toy Leashes
This blog article was originally posted on my first blog In Our Pond. I started out trying to put all my travel content on my homeschooling blog, but it grew to be too big. So, I'm moving all the road trip stuff over here! It'll probably take me a while to move all the posts, but I'll also be posting new content on here as well. In Our Pond will now be exclusively for homeschooling and parenting content, while this blog (Party Through the USA) is for all the family travel posts. Check them both out!
Today's Travel Time Tuesday is an oldie. A long time ago, when I had a bunch of little ones, I used to make and use these toy leashes all the time. They're so simple that I felt silly blogging about them. I was chatting with a friend yesterday, who asked me to do a post about these leashes so she could make them for her own little ones. I was happy to help.
Safety Statement- Any time you have a length of anything long enough for kids to get it wrapped around their necks, you run the risk of strangulation or death. When making this craft, consider carefully the distance the ribbon will need to reach from the point of connection (where you hang it) to the child. As always, craft at your own risk.

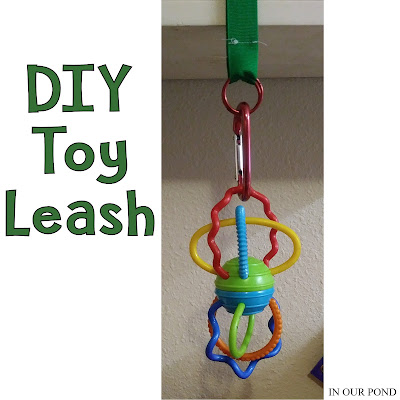
This toy leash can be attached to strollers, high chairs, car seats (on non-essential parts of the seat only), and used during travel. When my kids were younger, I used them during road trips to keep the kids sippy cups and favorite toys from getting lost. I attached them to the head rest on the seat in front of them or on the handle of the baby car seat.
The length of ribbon needed to make the leash will vary depending on where you intend to attach it and how far it will need to reach in order for the item to be accessible for the child. The easiest way to calculate the distance is to bring the ribbon out to the car some time when you have the child in their car seat and measure out the length. Then, add about 3" for the ends, more if you plan on tying knots rather than sewing.
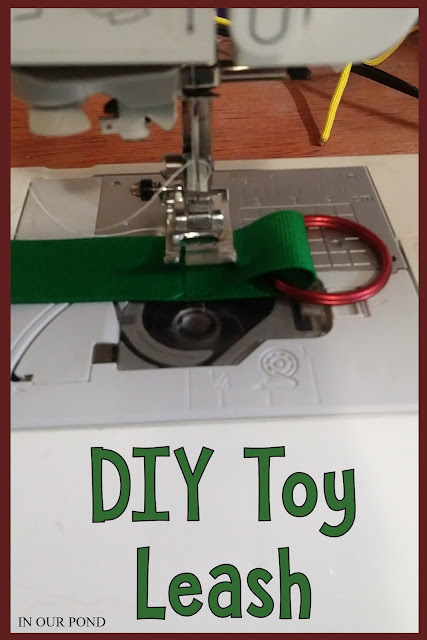
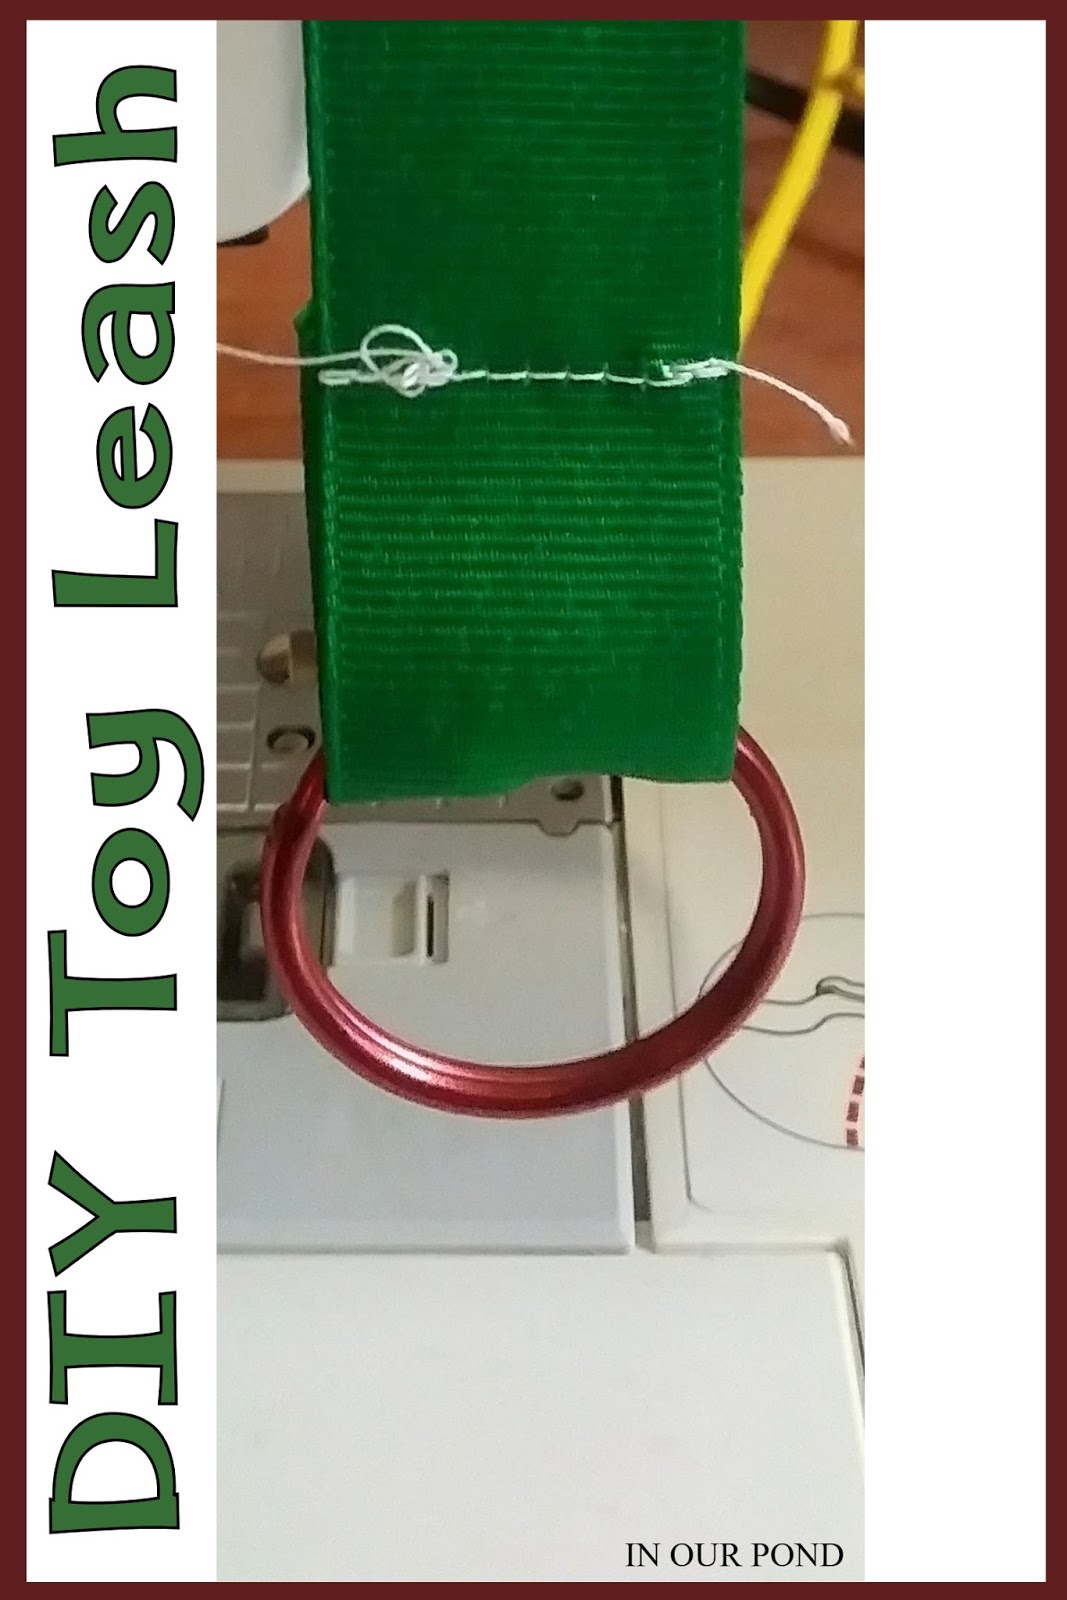
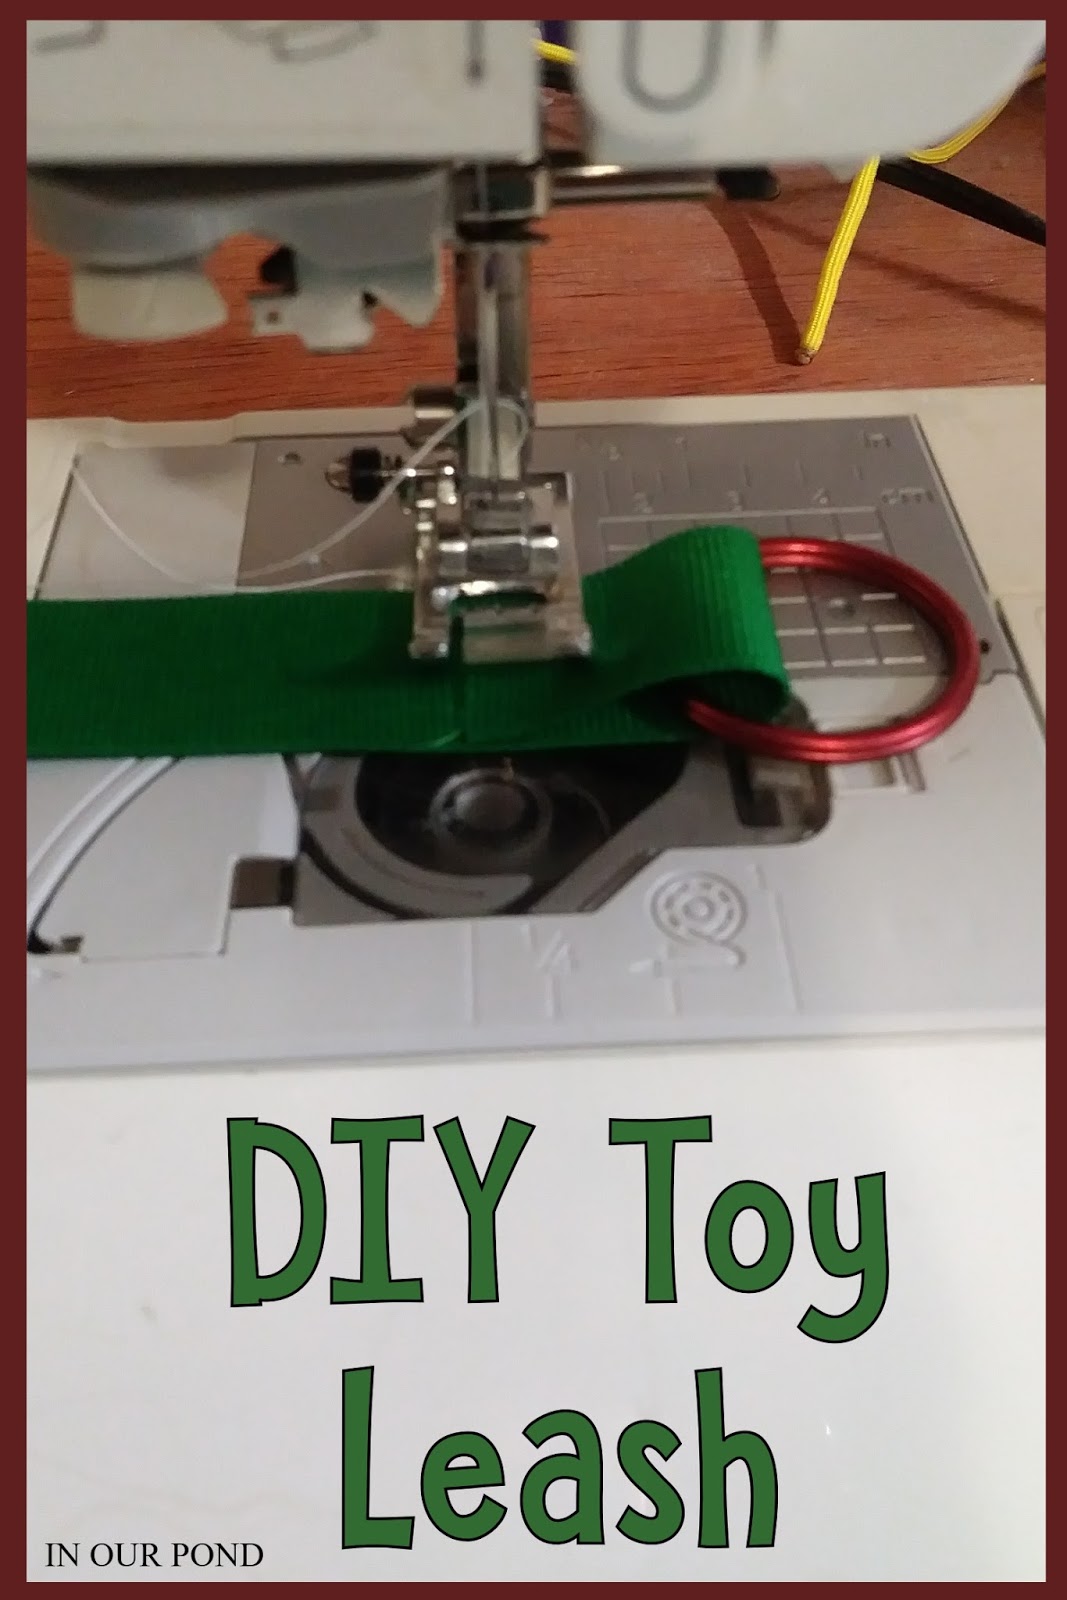
At your sewing machine, put the end of the ribbon through one key ring and sew shut (like pictured). Repeat on the other end. That's it- you're done!
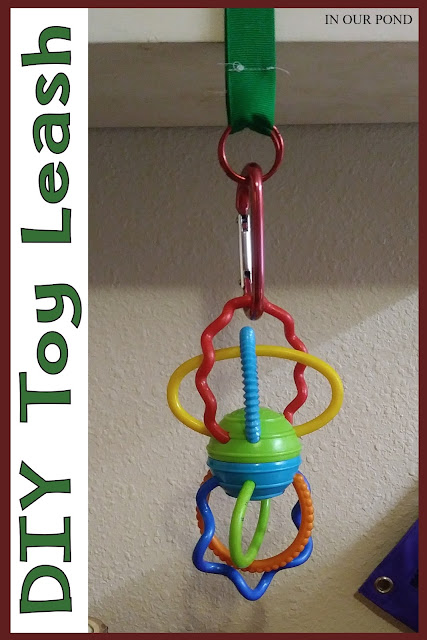
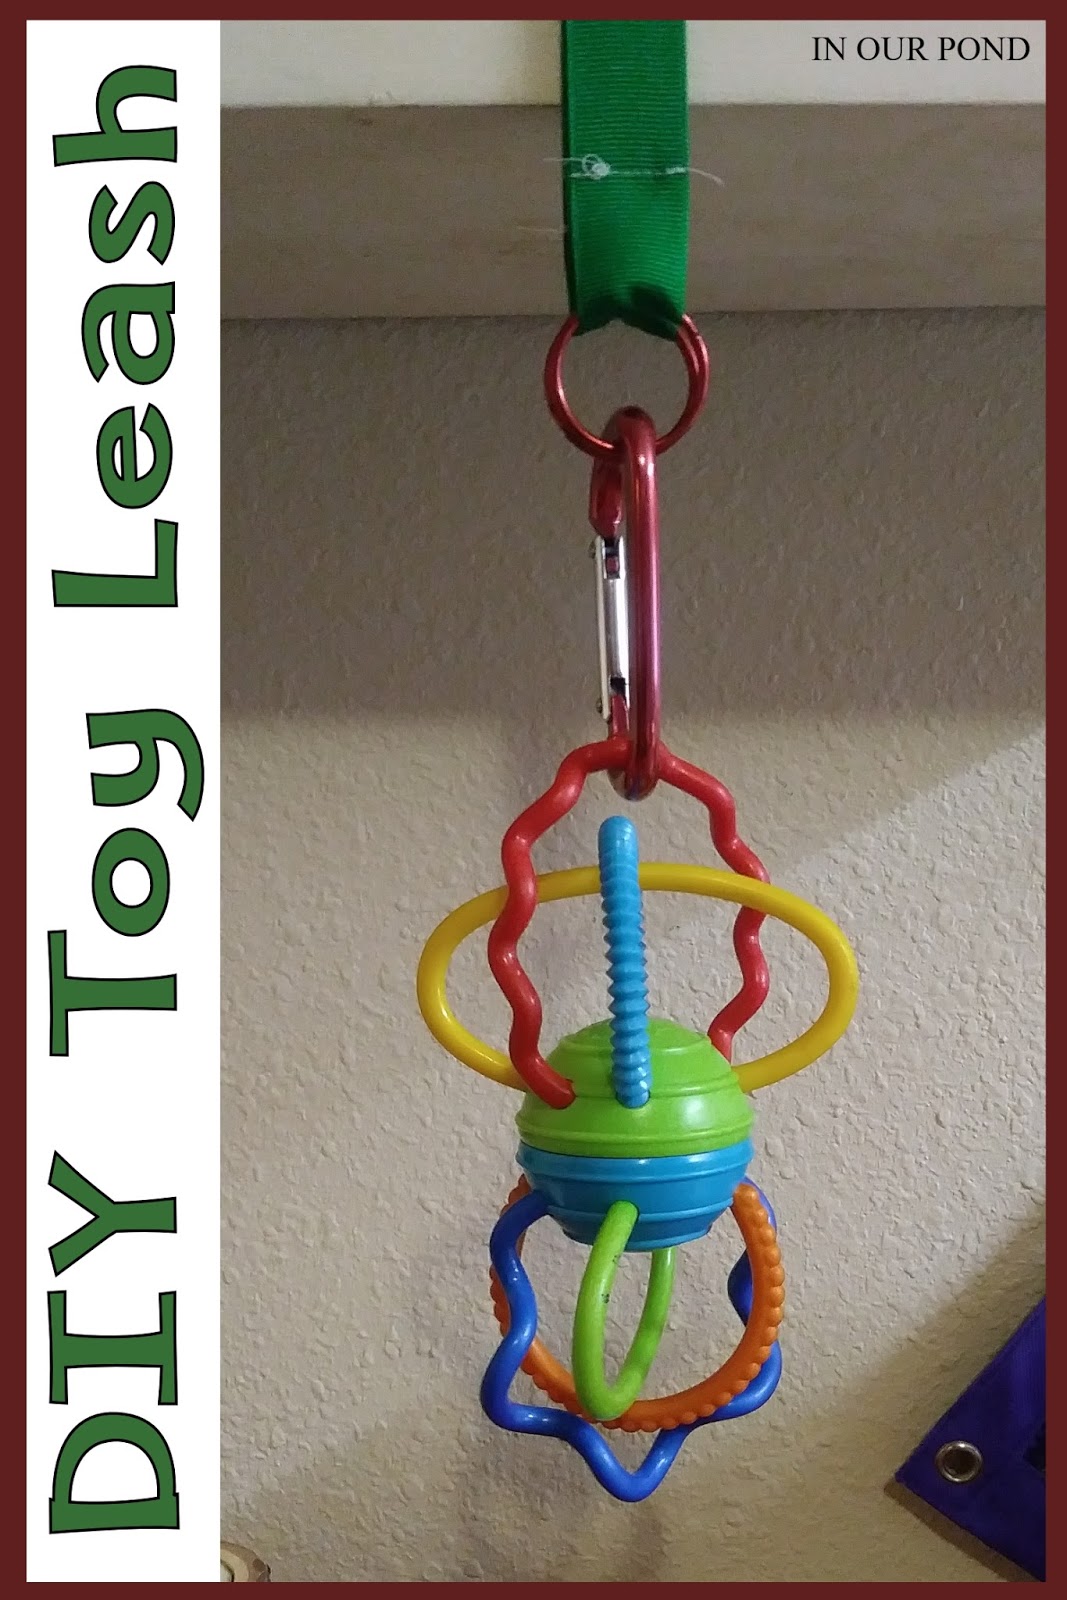
Attach a carabiner to each end of the ribbon. Clip a toy to one end and clip the other end on your headrest or car seat handle. When my daughter was a young toddler, I would put a pet collar around her lovies neck and attach the toy leash so we wouldn't lose it when we were out in public. It also made it much easier to find the lovie after she tossed it over the side of her car seat. When we got out of the car, I'd hook it to my purse to walk her inside.
You can also use the carabiners to clip a water bottle (like these) to the leash. It's great for bigger kids who still drop their bottles in the car.
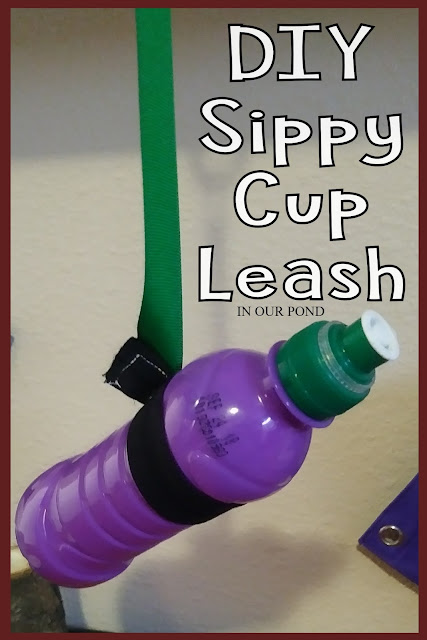
I also made leashes for the kids' sippy cups back in the day. As you can see from the picture, the cup leash is a simple piece of elastic sewn onto the ribbon. The other end of the ribbon has the key ring and carabiner just like the toy leash.
I didn't have any sippy cups in the house because my kids are past that stage. I grabbed this random juice bottle for my demonstration, but when my kids were little I preferred sippy cups like these, which has a narrow part for the leash.
You'll have to measure your own sippy cup and add about 1" for the elastic. Wrap the elastic around the cup loosely, pulling it just slightly. Sew it onto the ribbon, either in line with the ribbon or angled from it (like in the picture). And you're done!
Both leashes took me less than 5 minutes to make! Use this same idea to make easy toy dog leashes and collars, custom tethers for a leash backpack, and anything else you want. Enjoy!

Today's Travel Time Tuesday is an oldie. A long time ago, when I had a bunch of little ones, I used to make and use these toy leashes all the time. They're so simple that I felt silly blogging about them. I was chatting with a friend yesterday, who asked me to do a post about these leashes so she could make them for her own little ones. I was happy to help.
Safety Statement- Any time you have a length of anything long enough for kids to get it wrapped around their necks, you run the risk of strangulation or death. When making this craft, consider carefully the distance the ribbon will need to reach from the point of connection (where you hang it) to the child. As always, craft at your own risk.
Supplies
- ribbon
- toys
This toy leash can be attached to strollers, high chairs, car seats (on non-essential parts of the seat only), and used during travel. When my kids were younger, I used them during road trips to keep the kids sippy cups and favorite toys from getting lost. I attached them to the head rest on the seat in front of them or on the handle of the baby car seat.
The length of ribbon needed to make the leash will vary depending on where you intend to attach it and how far it will need to reach in order for the item to be accessible for the child. The easiest way to calculate the distance is to bring the ribbon out to the car some time when you have the child in their car seat and measure out the length. Then, add about 3" for the ends, more if you plan on tying knots rather than sewing.
At your sewing machine, put the end of the ribbon through one key ring and sew shut (like pictured). Repeat on the other end. That's it- you're done!
Attach a carabiner to each end of the ribbon. Clip a toy to one end and clip the other end on your headrest or car seat handle. When my daughter was a young toddler, I would put a pet collar around her lovies neck and attach the toy leash so we wouldn't lose it when we were out in public. It also made it much easier to find the lovie after she tossed it over the side of her car seat. When we got out of the car, I'd hook it to my purse to walk her inside.
You can also use the carabiners to clip a water bottle (like these) to the leash. It's great for bigger kids who still drop their bottles in the car.

I also made leashes for the kids' sippy cups back in the day. As you can see from the picture, the cup leash is a simple piece of elastic sewn onto the ribbon. The other end of the ribbon has the key ring and carabiner just like the toy leash.
I didn't have any sippy cups in the house because my kids are past that stage. I grabbed this random juice bottle for my demonstration, but when my kids were little I preferred sippy cups like these, which has a narrow part for the leash.
You'll have to measure your own sippy cup and add about 1" for the elastic. Wrap the elastic around the cup loosely, pulling it just slightly. Sew it onto the ribbon, either in line with the ribbon or angled from it (like in the picture). And you're done!
Pin It!
Both leashes took me less than 5 minutes to make! Use this same idea to make easy toy dog leashes and collars, custom tethers for a leash backpack, and anything else you want. Enjoy!
Our Favorite Baby Car Toys
Comments
Post a Comment